
COURSE TOUR
19 Cenntennial Drive, Palmerston North - 063578793 - office@manawatugolfclub.com
Watch a hole by hole flyover of the entire course or take an in depth look at each hole by viewing individual maps, drone flyovers and useful tips for each hole.
With a Multiple Tee System that offers seven non-gender based courses, players of any ability can choose the difficulty of course that they play on any given day.
Click on any of the maps below to enlarge the view and don't forget to print off one of our guides to take out on course with you.
Click below for printable guides:
We would like to acknowledge and thank the following contributors to the "Drone Project" who have all worked tirelessly to provide this unique and stunning view of our course.
Marketing Media (Kevin Bills and Alistair Thom) for filming and editing
John Garrett along with Golf Professionals Andre White and Alan Hyatt for their copy input
Chris Burn (Burnzee) for the voiceover
Kiel Stechman and the Greenkeeping team for presenting and maintaining our course in wonderful condition
FULL COURSE TOUR (see below to select individual holes)
COURSE MAP

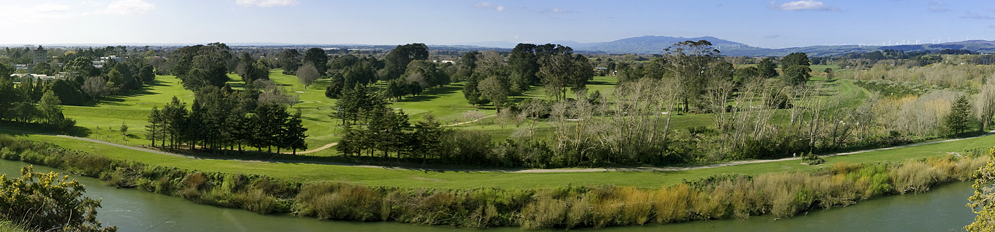
Based in the picturesque suburb of Hokowhitu, the Manawatu Golf Club borders the city's Centennial Lagoon and the banks of the Manawatu River.
Sited on over 42 hectares, the 18 hole parkland layout offers tree-lined, beautifully manicured fairways, fast rolling greens and over 50 white challenging white sand bunkers, providing a challenging yet fair test for golfers of all abilities.
HOLE BY HOLE COURSE TOUR

HOLE 1 (HOKOWHITU) - 371 metres, par 4
Place your drive right of the centre to open up the green. Take an extra club to counter dead ground in front of the green. Right side of the green is safest.

HOLE 2 (PINES) - 371 metres, par 4
The ideal drive is left of the centre 230 metres out. The green is well protected by right-hand traps. Long approach is best to the up-sloping green.

HOLE 3 (TE WAI) - 332 metres, par 4
Lay-up is an option from the tee. Stay left to avoid the grass swale. Centre short on the green is of least risk. Hole plays longer in the easterly wind.

HOLE 4 (DEVIL'S OWN) - 133 metres, par 3
Play for the centre of the green, irrespective of pin
placement. Heavily bunkered all round. Club selection is critical if the easterly is up.

HOLE 5 (STRANG'S) - 487 metres, par 5
Drive down the middle avoiding the left side fairway trap. Undulating fairway places a premium on second shot accuracy - left side opens the green. Distance control with approach is prime, a long shot minimises the risk of greenside traps.

HOLE 6 (CLIFFVIEW) - 409 metres, par 4 (par 5 women)
The tightest driving hole on the course so aim for the middle of the fairway. The fairway opens up to a long narrow green - avoid the deep greenside traps. Play as a par 5.

HOLE 7 (RIVERSIDE) - 485 metres, par 5
Safety is a priority despite the length of this hole. Centre right off the tee is favoured. A low boring accurate second is premium and must avoid high branches on the left to ensure maximum run. Approach to left side of green is best.

HOLE 8 (MONRO'S) - 186 metres, par 3
The longest par 3 presents a challenging long iron or lofted wood tee shot. Be short for safety. Avoid greenside traps protecting the pin placements.

HOLE 9 (TOTARAS) - 320 metres, par 4
Aim right of centre from the tee on this challenging and picturesque hole. Distance control to the green is critical. Watch for the prevailing wind - a low ball flight to the front of the green is best but be sure not to go too long.

HOLE 10 (GLENDINNINGS) - 372 metres, par 4 (par 5 women)
The best line is centre right on this long, dogleg left par four. The elevated green demands a longer club for the second shot as it is all carry, however try to stay under the pin.

HOLE 11 (TAWHITI) - 140 metres, par 3
Club selection is critical to ensure distance control to this split-level green, especially if the pin is on the top. Be sure to allow for any wind.

HOLE 12 (CROSSING) - 352 metres, par 4
The tee shot calls for accuracy and distance control. Right of centre will open the green. Allow for dead ground in front of the humped green. Putting from left centre is safest.

HOLE 13 (BIRCHES) - 361 metres, par 4
The most underrated par four on the course. Left centre to the plateau fairway opens the green to a mid-iron approach. Allow for dead ground short and be sure to avoid the large left bunker.

HOLE 14 (WESTWARD HO) - 450 metres, par 5
Position off the tee is critical and the right side of the fairway is favoured. Select a lay-up second over the grass swale to open the narrow up-sloping green. Stay under the hole and play away from the slope on the right side.

HOLE 15 (AVENUE) - 439 metres, par 5
A reachable par 5 for the big hitter, however well-positioned bunkers right will catch any errant second shot. A swale short of the small split-level green puts a premium on club selection and accuracy.

HOLE 16 (STOPBANK) - 155 metres, par 3
The most challenging of the short holes. Club selection is important to this cross facing and sloping green.

HOLE 17 (TE RUA) - 372 metres, par 4
A tee shot down the middle of this wide, clear fairway leaves a mid iron in, however allow for dead ground in front. The green is well trapped both right and left and these need to be avoided.

HOLE 18 (ABRAHAM'S) - 320 metres, par 4
A well-bunkered closing hole that rewards a conservative tee shot. Fairway bunkers right and left will challenge long hitters. The split-level fairway opens to a generous dished green. Careful club selection in the prevailing wind is essential.
Practice Facilities

PRACTICE FAIRWAY

PUTTING GREEN

CHIPPING GREEN